Even flake broadcast comes from three simple disciplines: toss the flake underhand at chest height so chips float and rotate down, work in 8 ft sections that match your epoxy open time, and make a second perpendicular pass on every section to fill gaps. Bald spots happen when you toss overhand from too high, the chips lose air resistance, and they hit the wet epoxy in clusters. Most first-time DIY installers get this wrong, and the fix is a simpler technique, not more flake.
The Physics of a Good Flake Toss
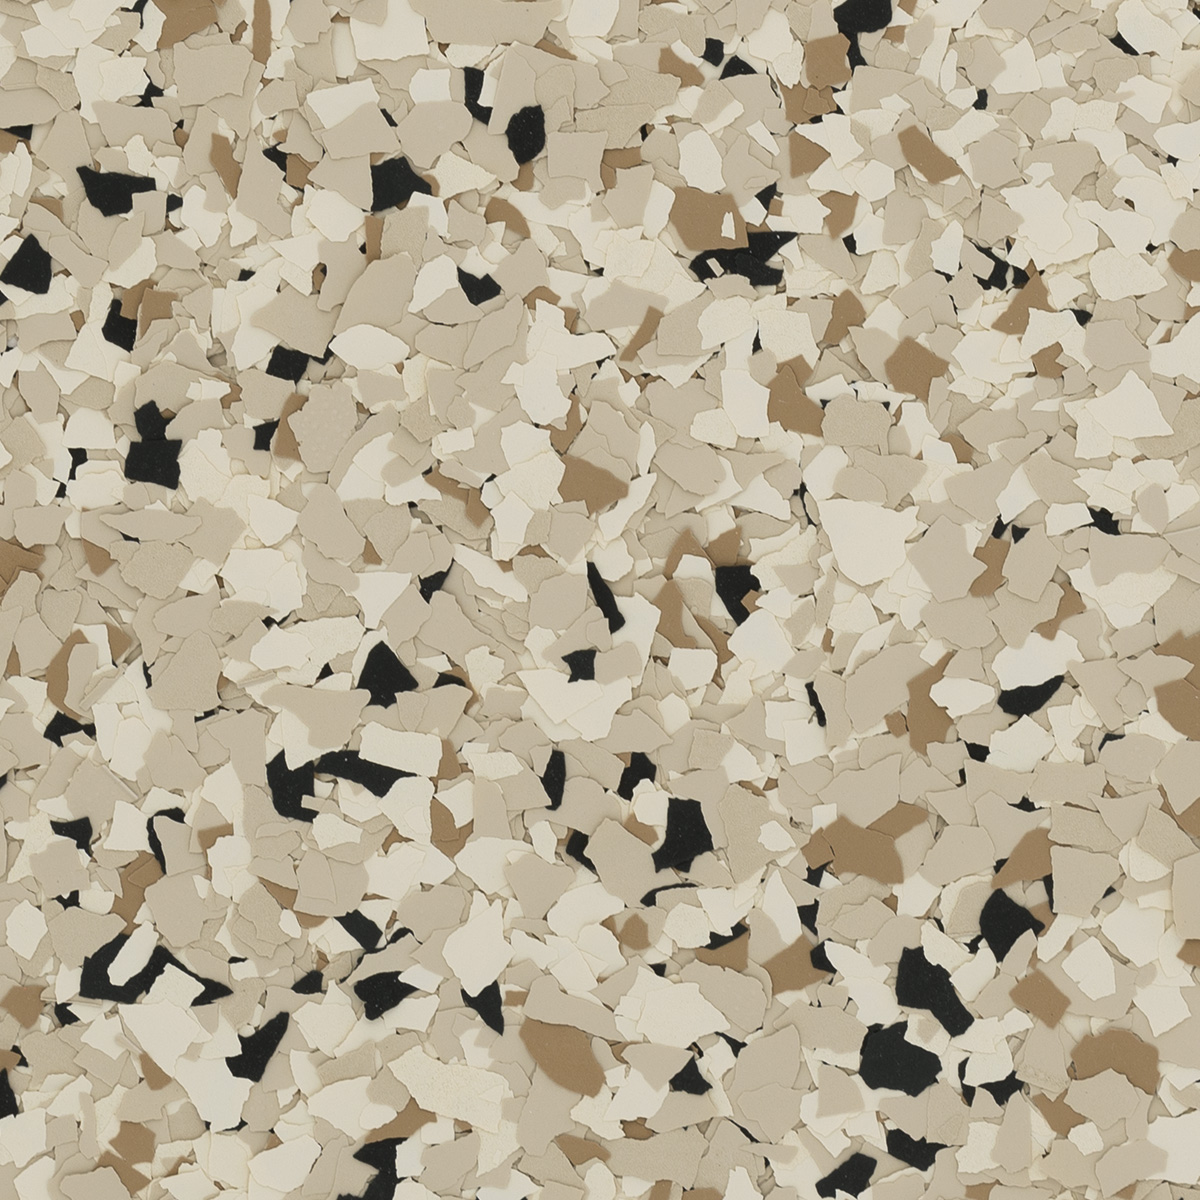
Vinyl flake chips are about 1/4 inch across and weigh roughly 0.001 oz each. Their flight pattern is determined by air resistance, not gravity. A chip thrown overhand from head height drops fast and lands in a tight cluster. A chip tossed underhand from chest height fans out as the air catches the flat side of the chip and slows it down. The flat side wants to face up. That is the look you want, chips landing flat with maximum visible surface area.
Hold the flake in a small handheld bucket, scoop, or coffee can. The right amount per toss is roughly a half-handful, maybe 4 to 6 oz. Bigger handfuls make clusters. Smaller handfuls take forever to cover a floor.
The Right Body Mechanics
Stance and motion matter as much as the flake itself. Here is the form that gives even coverage.
- Stand outside the wet zone. Always be on cured concrete or unbroadcasted area, never on wet basecoat.
- Scoop a half-handful of flake. Cup your hand or use a small scoop.
- Throw underhand from chest height. Wrist flick, not arm swing.
- Aim above your target zone. Toss toward the ceiling at a 60 to 75 degree angle. Let gravity bring the chips down. They will fan out as they fall.
- Cover an 8 ft x 8 ft zone with 6 to 10 underhand tosses. Walk along one edge of the zone, tossing perpendicular to your walking direction.
- Then walk a second pass perpendicular to the first. If you tossed north-south on the first pass, walk east-west on the second pass. This is the single most important trick for hiding directional gaps.
A skilled broadcaster covers about 30 to 50 sq ft per minute at medium density. Faster than that and density gets sloppy. Slower than that and your epoxy basecoat starts to skin over before you finish.
Why Section Size Matters
Epoxy basecoat has a working window, called pot life. Most 100 percent solids epoxies give you 25 to 40 minutes at 70 degrees F. Roll the entire garage at once and your epoxy will skin over before you can broadcast the last 100 sq ft. The solution is to roll and broadcast in sections that match your pot life.
- Standard section: 8 ft x 8 ft (64 sq ft). Roll, then immediately broadcast.
- Pot life budget: 5 to 8 minutes per 64 sq ft section. Mix, roll, broadcast.
- Section count for a 2-car garage (400 sq ft): about 6 to 7 sections.
- Total install time for flake broadcast on a 2-car: 30 to 45 minutes.
Working in sections also makes the perpendicular double-pass possible. By the time you finish the second pass on section 1, section 2 has just been rolled and is ready for broadcast.
Common Bald Spot Causes
If your test panel or first section has bald spots, look at this list.
- Overhand throwing. Chips clustered. Switch to underhand toss.
- Throwing from above shoulder height. Same cluster issue. Drop to chest height.
- Not enough total flake. Medium broadcast needs 0.15 to 0.20 lb per sqft. Below 0.10 lb per sqft you will see basecoat.
- Wet basecoat already skinning. Chips bounce off instead of sticking. You have to broadcast inside the open time window.
- Air movement in the room. A box fan running during broadcast will blow chips into drifts on one side. Turn fans off during the broadcast step, then back on for cure.
- Only one pass. Single-direction throwing always leaves striping. The perpendicular second pass eliminates it.
- Tossing too close to the wall. Chips bounce off vertical surfaces. Hand-place flake along walls instead of tossing.
The Wall and Corner Technique
Walls are the hardest part of any broadcast. Chips bounce off the vertical surface and create thin spots in the last 6 to 12 inches. Two fixes work.
- Toss with the wall behind you. Stand with your back near the wall and toss outward into the room. The chips that bounce off any vertical surface will be coming back toward the wall behind you, evening out the density.
- Hand-sprinkle the last 6 inches at the wall. After your two perpendicular passes, walk the perimeter and gently rain flake from a low cupped hand directly down onto any thin spots within 6 inches of the wall.
Corners are similar but smaller in area. A pinch of flake released from 12 to 18 inches above the corner fills the gap without bouncing chips back.
How to Tell If You Have Refusal Coverage
Refusal, also called full broadcast, is the point where the floor will not absorb another chip. Toss flake at a fully broadcast section and the chips bounce off and slide off existing chips. That is the visual cue. If you toss and the chips disappear into the surface, you are still below refusal.
Here are the working broadcast density targets and what they look like.
- Decorative (0.10 lb/sqft): You can see clear basecoat between every chip. Looks sparse.
- Light medium (0.15 lb/sqft): Chips cover most of the basecoat but small gaps are visible.
- Medium (0.20 lb/sqft): Chip-to-chip coverage with only narrow lines of basecoat visible.
- Full or refusal (0.25 lb/sqft and up): Zero basecoat visible. Chips overlap. New chips bounce off.
What to Do After Broadcast
Resist the urge to push or smooth chips into the basecoat. Leave them sitting on the surface. Walking on freshly broadcast flake is also a mistake unless you are wearing spiked shoes designed for the purpose, called spiked epoxy creepers, that distribute weight and avoid embedding chips into the basecoat.
- Let the basecoat cure 8 to 24 hours depending on temperature.
- Scrape loose chips off the surface with a flat-bladed scraper held at 30 degrees.
- Vacuum loose chips and save them for repairs or future touchups. About 30 to 50 percent of broadcast flake comes off as loose.
- Lightly sand any sharp chip points with 80 to 120 grit before topcoat.
- Roll topcoat at 4 to 6 mils, covering and sealing the embedded flake.
After the topcoat cures, the floor is uniform, smooth, and the broadcast pattern is locked in for the life of the floor. There is no way to redistribute chips after this point, which is why technique on the broadcast day matters.
Practice Before You Commit
If this is your first flake install, practice the toss outdoors with leftover or sample flake. Throw underhand at chest height onto a tarp and look at the pattern. Compare against an overhand toss. The difference is obvious within 10 minutes of practice. That free practice session is the highest ROI investment in the entire project. If you want to play with blends and see how different chip mixes look across an even broadcast, the custom blend builder shows real coverage previews before you commit to a SKU.
Even coverage is a technique problem, not a product problem. Underhand toss, chest height, 8 ft sections, double pass perpendicular. Do those four things and the bald spots disappear.